
Every two weeks at YLD, we host a learning lunch where anyone can speak about insightful topics, not just limited to software engineering or design. Topics range from passion projects to diversity and inclusion, technical software engineering, product design topics, and more. This learning lunch session is called “Brown Bag”.
Last week, we were graced by a visiting speaker, Guilherme Ornelas, to talk about his passion project, Tat Me Up! His brother, Manuel Ornelas, is one of our talented Product Designers at YLD who has also joined him to pursue this project.
Guilherme wanted a new challenge from his daily routine, so he created an opportunity for himself to combine coding to create an app that involved his passion for tattoos. He was driven by a purpose, to create a valuable tool for artists and customers while learning about Three.js.
What is Tat Me Up?
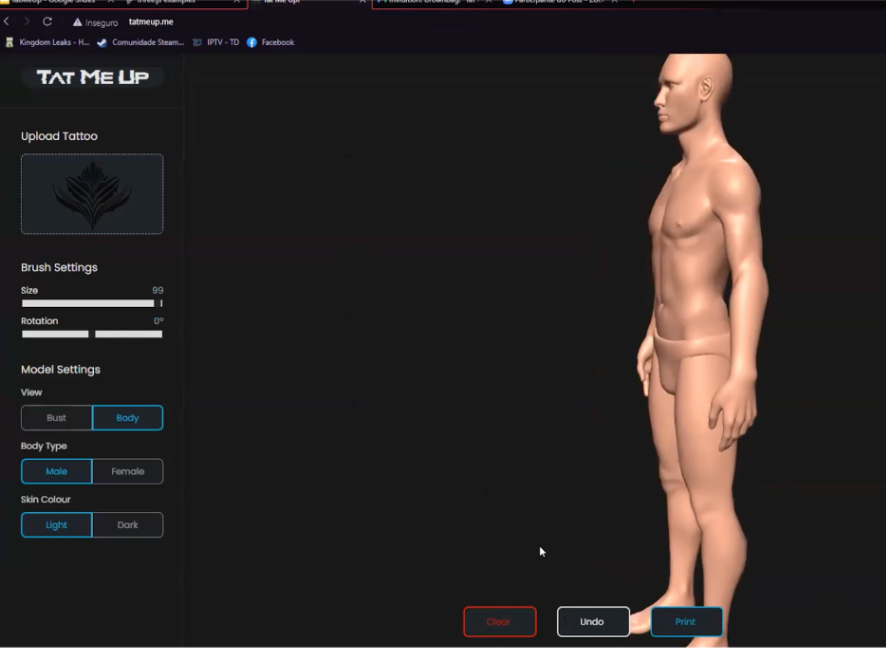
It’s a simple web application that allows users to interact with 3D human models to apply decals to the model’s skin. It enables the user not only to view how a tattoo will look on the body but can also create new tattoos using this application.
Three.js
Three.js is a “3D library that can run GPU-powered games and other graphics-powered apps straight from the browser.
The three. js library provides many features and APIs for drawing 3D scenes in your browser”.
The basic functions
“Init” is the first function which initializes everything. There’s only one line of code for each of the following:
- Scene
- Renderer
- Camera
- Controls
- Objects
Then there’s the “Animate” function that triggers an infinite game loop that listens to your input calculates the physics, and renders the frames. For Tat Me Up! specifically, Three.js focuses solely on listening inputs and rendering the frames.
The high-level process to create Tat Me Up!
- Import the decals example to the project from the 3GS website.
- Create new images/ new decals and apply them to the 3D model. Rotate and resize the decals on the models.
- Load more 3D human models.
- Create more auxiliary functions like delete the previous images, delete all images, change models, etc.
- Add style to the website
Importing new decals:
Three HTML elements were created. The first line is the label with the text “Upload Tattoo”, which interacts with the input (second line).
On the input, it asks to upload an image from the computer. Lastly, the input asks for an image to be uploaded from the computer, so the “div id” allows an image to be in the background.

Decal Controls using Javascript:
- Add input with the query selector.
- Add event listener so when the input changes, it will create the reader
- When the reader loads, it will place the image in two places:
- Div (background image)
- decalMaterial.map (the image that will be placed on the 3D human model)

Decal controls: resizing and rotating the image
Creating sliders and labels allow the two elements to complement each other. When the slider goes up, it will automatically increase the size as well
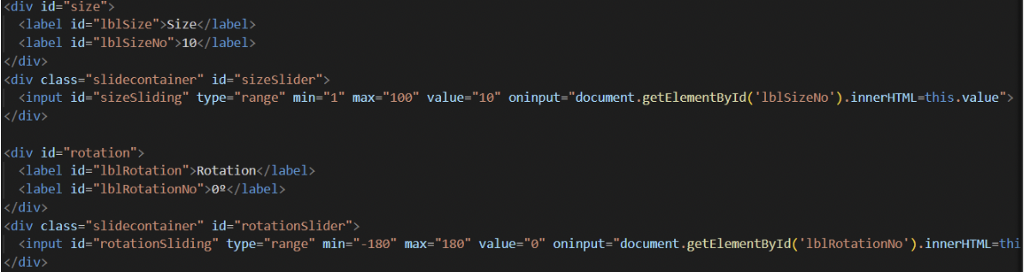
The same process is applied for allowing rotations.
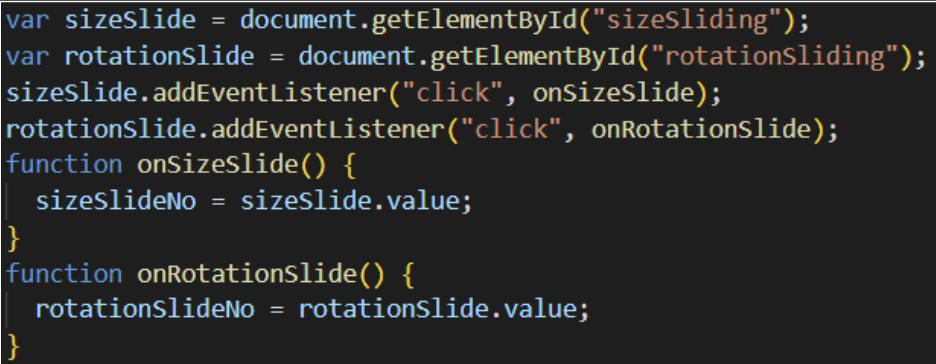
Both sliders (sizeSlide) in the first two lines of code below were taken, and “event listeners” were added for clicking, so when the sliders change the values when an image is added, the image can then be rotated and resized.
Creating more 3D Models
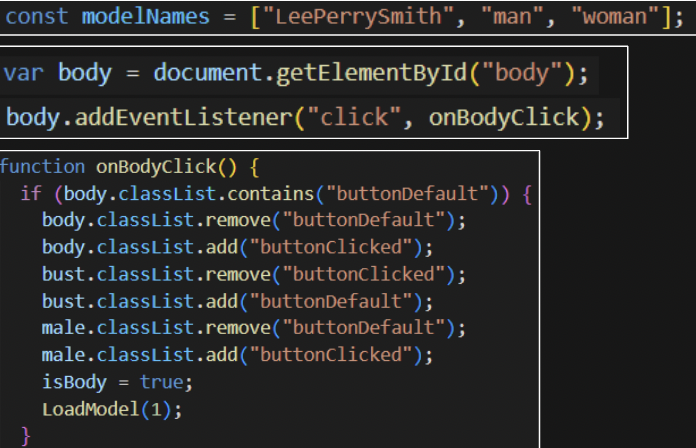
For this project, Guilherme downloaded three human models online and created buttons to change them by adding male and female buttons. The “body” and “bust” buttons were added so either male or female bodies will be activated when one or the other is selected.


Javascript function
Guilherme created a variable and assigned it to the body button. An event listener was also added for clicking purposes. This part of the code is to design the buttons:
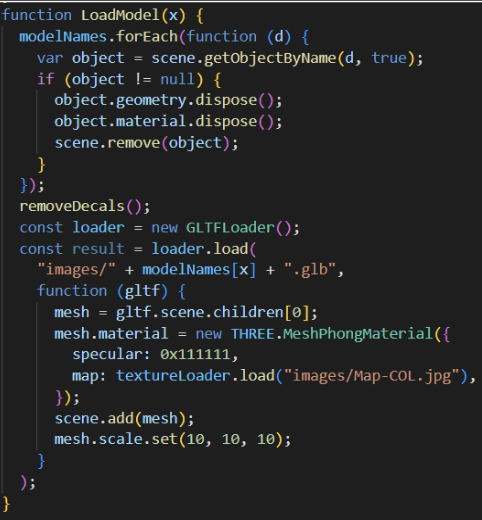
The load model function via Javascript
For each of the 3D human models, the “scene” will be searched and erased. The decals then will be removed, meaning the images on the human models will be removed.
To create the loader, a Three.js function (new GLTFLoader), he added this to the mesh and set the size by mesh.scale.set.
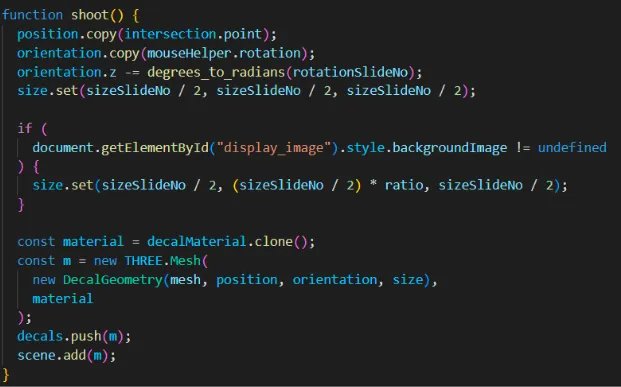
Adding the decal/ image to the 3D human model
First four lines of code: we get the values of the mouse's position and set the size with the values stored in the sliders variables.
The “If” condition is just a specific case wherein if no image is loaded, it will shrink by half the size of the default image.
The last seven lines of code: We create new material and assign it as a clone of the uploaded image, then create the 3D mesh that will be applied to the 3D model. This gives it all the values we assigned prior.
Additional Functions
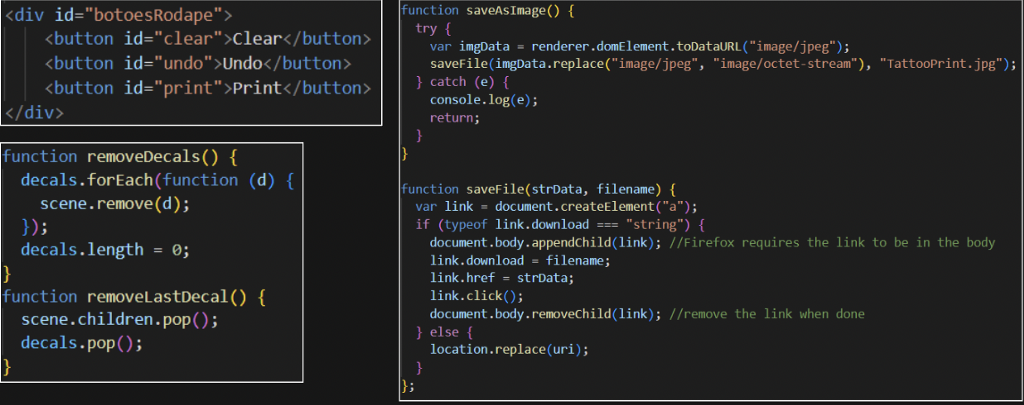
The purpose is to clear, undo or print, as you can see at the bottom of the screenshot below the 3D human model.
On the HTML, these three buttons were created. To remove decals, there is a list in the code and for each to be removed, the list will be set to “0”. To save the image, a boolean logic was created where it works with the animate function that’s on an infinite loop. This would run the function to download the image or “saveFile”.
All about design
A CSS had to be created with 700+ lines of code which were way more than what was originally written for Javascript.
As this was Manuel’s passion project as well, he wanted to explore and learn more about Auto-layout, create the simplest layout for the user using the current set of tools, and explore dark and light mode for Tat Me Up!.
Layout
Some of the main priorities in the design aspect were for the decals to be scalable and for the application to be accessible for ease of user experience.
The main segments are settings, the working area, and the three buttons.
- Settings
The sidebar (left side of the screenshot) is easily scrollable, so whenever more features want to be added in the future, there’s no limit to what can be added.

- Working area
This is where the actual 3D human model and creating the decals for the body
- Final area
The three buttons: clear, undo, and print
Dark and Light mode
This small table shows how the colours would transform between the two modes.
For dark mode, more vibrant and lighter colours are used, whereas for the light mode in progress, dark blue and dark red will be incorporated for accessibility purposes.

Currently, this is still a work in progress, but as the project continues to evolve, some of the future improvements and priorities are listed below:
- Responsiveness and mobile version
- More 3D models
- Custom models
- Google ads
- Library of tattoos
- “Preview before apply” feature
- Further clean up the code
At YLD, we love to support our incredible talent with their passions and side projects outside their 9–5! If you’re looking for an opportunity to grow in either the software engineering or product design field, contact us at YLD, as we have a lot of great open roles for you to check out.


